The Water Heater Exchange
Our water heater is also known as a calorifier. Instead of using gas or electricity to heat the water as residential units do, our unit uses excess heat from the engine to heat an insulated 20 gallon water tank.
During our troubleshooting of the coolant circuit on the Diesel engine, we discovered that the heat exchanger inside our water heater was leaking. Thus, the antifreeze from the engine was allowed to mingle with the allegedly potable hot water supply, a very bad thing considering how toxic engine antifreeze is. Luckily, we never use hot water for anything we ingest, so the damage was limited.
Incredibly, we discovered that even a water heater was too difficult to install for Prout Catamarans. Instead of following the instructions of the manufacturer, Prout connected the pressure-release valve into the fresh-water supply instead of draining it into the bilge. Thus, this important safety device was disabled. Not only could the tank get ruptured by excessive pressures (with nowhere to go) but scalding also became a very real possibility.

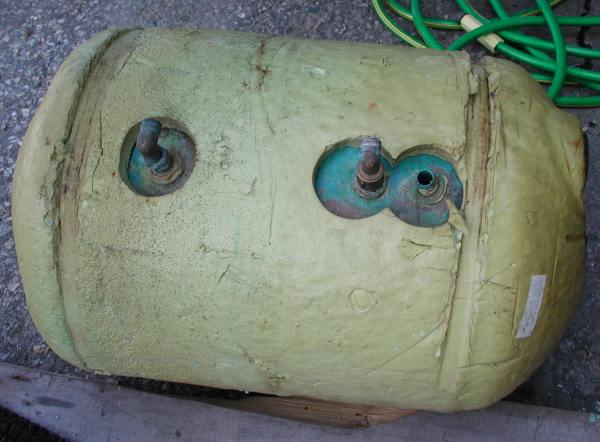
Interestingly, the OEM water heater had no exterior shell. Instead, a spray-on polyurethane coating attempted to keep the tank warm. In theory, this would have worked OK if the long lengths of copper pipe attached to this tank had been insulated. However, between the lack of pipe insulation, the long lengths of pipe attached, and the inadequate heat transfer inside tank, we hence had a recipe for very little hot water on board.
The tank itself was constructed of solid copper with copper tubes soldered inside to act as a heat exchanger. Like most water heaters sold today, our OEM-installed water heater/calorifier did not have a removable heat exchanger. So, once our water heater started leaking, it had to be replaced in its entirety. Given the sub-optimal performance of the OEM unit, this was not a hard decision.

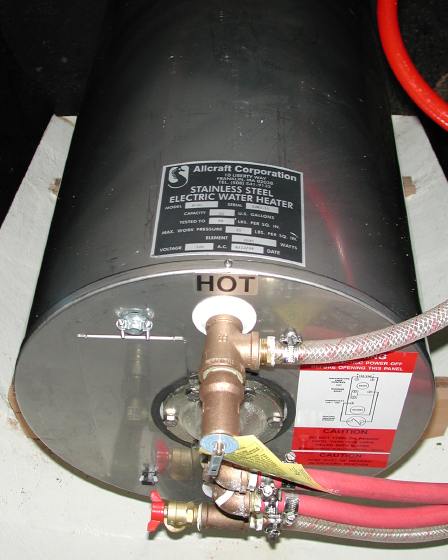
After some online reserach, we chose a model H-20 from Allcraft, which features a stainless internal tank, a stainless exterior, a removable heat exchanger, and a 10 year warranty. In other words, this will be, most likely, the last water heater we'll need for the boat. Even better, all the connections are on the front of the heater instead of being side-mounted like on the OEM model. In the unlikely event that the Allcraft unit does need service, all removable parts can be easily accessed (you're looking at them).
Unfortunately, the outer diameter of the Allcraft heater is somewhat smaller than that of the tank it replaced, so the extant strap-based mounting systems was no longer going to work. As the Allcraft unit has a set of built-in legs, we simply cut down the old round tank mounting tabs and installed a flat platform between them. We then attached the water heater to this platform.
The Allcraft unit comes pretty bare, save for two 4" long ¾" diameter potable water pipe nipples, a neat "T" for the Temperature & Pressure valve, as well as the T&P valve itself. Thus, we bought the hardware to reduce the intake size of the heater core from 1" to ½" and to attach it to hoses, while also replacing the extant potable water pipe nipples with something shorter (to stay out of the way of the hydraulic motor below in case it needs maintenance). Lastly, we ensured the tank had a boiler-style ball valve, so it can be drained in preparation for winter lay-up.
So far, we really like the Allcraft water heater. Not only does it offer lots of hot water, it also keeps it piping hot for a very long time. The large heat exchange core quickly raises the tanks water temperature when the engine is running, and we still have the possibility of engaging the 110VAC heater (behind the flap on the left) should the Cat's PJ's ever have a 110VAC system installed to take advantage of shore power. Yay!
Best Estimate of Time Required:
| Remove old water heater | 30 min |
|---|---|
| Create new Platform | 2 hours |
| Install new Allcraft water heater | 2 hours |
| Total | 4.5 hours |
|---|


