


The Process of Fixing the Hatch
This page describes how we fixed the leaky furnace hatch design found on our Prout Escale. If anything else, it is a good indication of how much trouble one has to go through to fix little details on the boat that end up costing a lot of money because of subsequent damage. I question the state of mind of the Prout Catamarans designer when he/she designed this hatch. I can only hope that, along with the companionway redesign, later Escales feature less trouble-prone hatch designs.
Initially, we tried the plaster cast method since we thought this would be the quickest way to get a molded surface copy. However, we discovered quite quickly that the plaster could not support itself over such a long shape. Thus, we elected to go with something easier like polyester mixed with fiberglass.
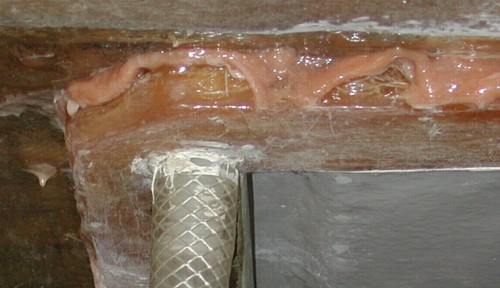
Luckily we could reuse almost all the hardware jigs we had created to hold the plaster in place while it was drying. We covered the Escale hull surface around the hatch frame with lots of wax to keep the polyester from adhering to it. We did the same for the jig before inserting it below the polyester mix. Then, we applied the thickened polyester to the underside of the hatch frame with the jig to support it from below.
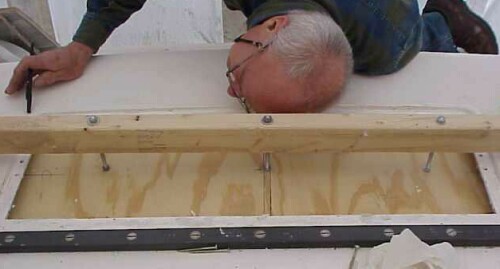
Attempt number 2: Measuring up. Note the split board which allows the removal of the backing board in two sections. The wooden beam next to Geralds head acts as a tensioner for the split board, holding it in place. The flat board and the frame around the hatch have been thoroughly waxed to avoid the frame mold from sticking permanently. The large gray bar in the foreground is the Harken traveler.
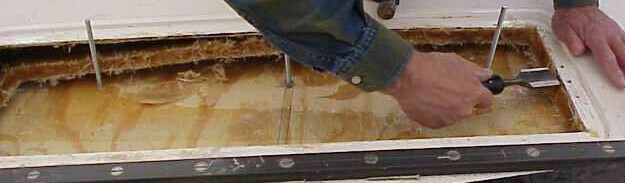
Removing the frame despite all the precautions is harder than it looks! But note how the flexibility of polyester works to our advantage here. The sections did not break, despite flexing quite a bit.
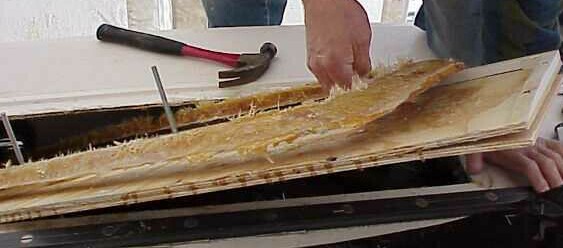
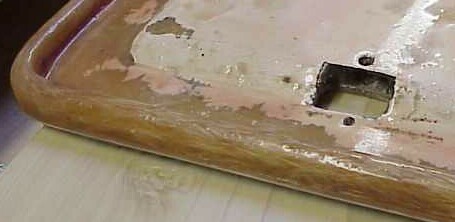
At last the mold for the future frame can be extracted. Note how uneven the surface of the mold is - a perfect match to the underside of the hull around the hatch cut-out. This frame was the basis for a more permanent frame made of epoxy and fiber. While the easy route would have been to just slap successive layers of epoxy and fiberglass to the underside of the hatch frame, it would not have given us the level of quality control we wanted. The route we chose allowed us to create a watertight and voidless frame to mill into for the drainage we desired.
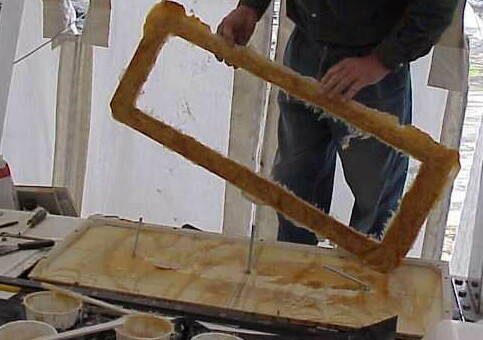
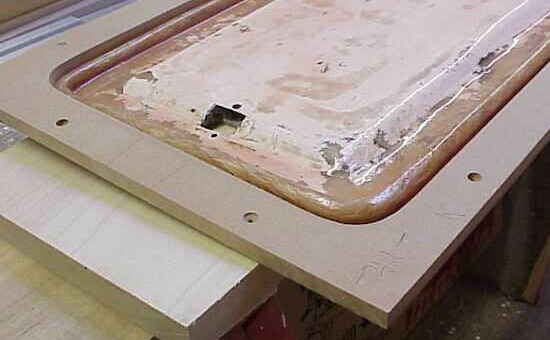
The completed template being removed from the Prout Escale. Note the split board in the foreground and the fiberglass fibers hanging off the molded frame section. The frame was cleaned up, then we made a mold for the epoxy/fiberglass frame that was added to the bottom of the hatch frame. In the picture below you can see the new frame under the deck along with one drain. The wads of thickened epoxy paste between the frame and the hull will ensure a good joint.
Once the frame had been fixed, the time came to re-make the hatch cover itself. We needed to add a new flange and re-build the locking mechanism - all the wood around it had turned into mush.
The hatch cover with its new flange. Note the visible fibers in the flange. The visible cutout is where the hatch dogs used to be - that section of the hatch was so rotten it had to be removed and will be re-built with epoxy to ensure no further spread of the rot. With the right amount of grease, water ingress through the epoxy-updated dog system should be minimal.
The frame and the very precise mold the hatch cover flange was manufactured in. The mold was then used to guide the router on board our Prout Escale. This way, perfect fit and finish were assured.
While it was interesting to learn about the process of making casts and molds, the real question is why Prout Catamarans forced us to jump through all these hoops in the first place. For all the years of design experience the company claims, costly details like this one should have been obvious and should not have found their way onto our Escale.
It's a shame given the many "good" details that are evidenced on board. But I imagine it is this sort of lack of attention that turned the charter fleets off of Prout and allowed the French builders to muscle in. Charter fleets cannot afford downtime... either the boat is bullet-proof or it's sold to a greater fool.
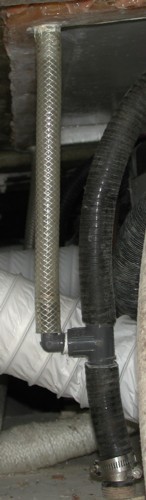 Here is a detail of a corner of the new hatch frame. Note the deep groove that surrounds the hatch perimeter. The drain in the corner of the groove redirects water to the main bilge drains below. A simple T connection allows the much smaller hatch drains to interface with the 1" bilge drains. The reinforced frame around the hatch follows the contours of the underlying hull and is of the same total thickness as the fiberglass under the traveler. Most people would not notice that the hull has had a major operation here.
This is a very simple design that Prout could have followed when they built the Escale series. After all, the main bilge exhausts were situated almost perfectly with respect to this hatch. The incremental cost of incorporating the groove and drain into the mold for the Escale hull is zero. Adding eight hose clamps and two hose "Tees" would have cost maybe $10. The incremental labor cost of hooking up the hoses to the drains would have been maybe $5. Total incremental cost to Prout Catamarans: $15.
Now compare our costs. Besides the broken $3,000 heater, we had also to contend with the aftershocks of the leaks (see the rear compartment repair saga for more detail). It is sad that keeping water out of our Prout Escale turned out to be such a big deal. You cannot overvalue a good surveyor when they point out details like this that will turn into big problems.
Perhaps it is details like these that ticked off enough Prout catamaran owners into abandoning the brand once many other companies started producing catamarans.
Best Estimate of Time Required:
| Initial measure, construct support boards, rig | 4 hours |
|---|---|
| Attempt#1 to make hatch frame template w/plaster of Paris | 2 hours |
| Attempt#2 made w/polyester resin | 4 hours |
| Construction of reinforced hatch frame | 8 hours |
| Installation of reinforced frame, route drain, installation of drain receptacles | 8 hours |
| Measurement of hatch perimeter, construction of mold, addition of "lip" | 8 hours |
| Total | 34 hours |
|---|