First Steps in the Right Direction
Prout Catamarans installed a custom Volt and Ammeter into our Escale. The unit sensed voltages and current draw within the confines of the Link Box while displaying the results on the main circuit breaker panel. While the display showed crude but accurate amperage information, the voltmeter kept jumping all over the map, making it useless. The unit was replaced at least once by Prout Catamarans, to no avail.
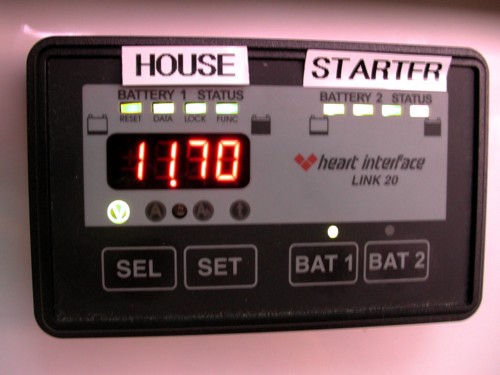
Thus, our first step to troubleshoot the electrical system was to remove the old volt-meter and ammeter. I liked the inherent simplicity of the Heart Interface Link 20 series of power indicators, showing battery levels as easy to read LED bars. There are better units out there but they also tend to be harder to learn.

Installing the Link 20 was relatively easy. We installed the shunt block in the battery compartment and the display unit next to the circuit breaker panel. We were happy that we bought the Heart Interface wiring bundle - it uses all the wire color schemes that their manual recommends (surprise, surprise) and is sheathed in a good jacket. It took two of us about a day to do it all, from installing the new shunt in the battery compartment to snaking the wire to the control panel. Setting up the unit was relatively easy but requires you to read the manual at least once.
Our Link 20 battery monitor quickly showed us how little charge was actually trickling back to the batteries. We realized that the batteries on board would have to die an early death under the prevailing conditions - an undersized charger would never refill them properly. Subsequently, they would sulphate and die. Thus, our next step was to upgrade the main bus wiring and the charge system.
Best Estimate for Time Required:
| Remove existing voltage, amp measurement tools, reconfigure Link box | 2 hours |
|---|---|
| Install new shunts, route wire through boat to Link 20 | 3 hours |
| Install, configure, test Link 20 | 1 hour |
| Total | 6 hours |
|---|


