The Hydraulic Pumps
The hydraulic pumps in our Prout Escale system got abused pretty badly in the first years of their lives. One was submerged for a winter (and unlike its companion, did not explode due to ice expansion). Then the two pumps were rained upon relentlessly as the cockpit efficiently drained on top of them. Thus, despite the sloppiness of Prout Catamarans, our hydraulic drive system survived more than I would have thought. Who knows what a center-nacelle engine would have looked like after 5 years of exposure to the elements.
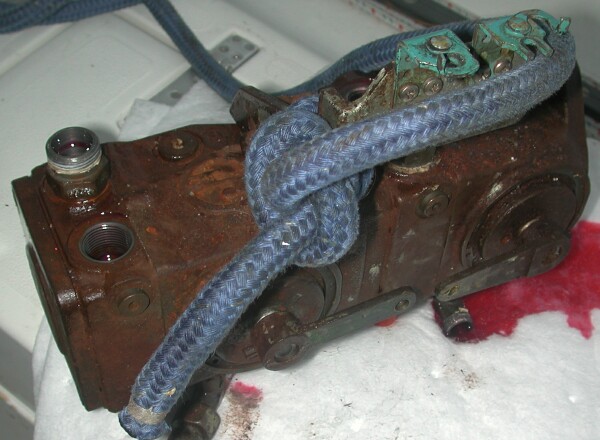
Here we have a top view picture of the two hydraulic pumps after we had extracted them from the back of the engine in our Prout Catamaran. The four ports in view are the A&B ports for each hydraulic pump-motor circuit. Another set of ports below stream excessive oil back to the hydraulic oil tank (T-lines). A set of port on the opposite side provide oil (suction or S-lines). The leftover rope helped us pull the pumps to safety while minimizing internal contamination. Note the extensive rust due to the cockpit leak. The undersides were not rusty, but I imagine that is because they were not subject to as much water.
The two levers on the side control the direction of the hydraulic fluid flow (forward, reverse, neutral) while the pumping quantity is given by the engine speed. Above the levers are the mounting points for the control cables that set pump direction.
After tracking down some Rexroth representatives at an industrial show, I was able to accomplish a number of things. First of all, I was able to get some pretty rare manuals on the pumps. Second of all, I was able to talk to the people who actually knew the pumps. From the conversation I learned that the bypass pressures on our pumps had been set too high. This was the reason that the control cable would jerk out of its holder so violently when the motors were blocked.
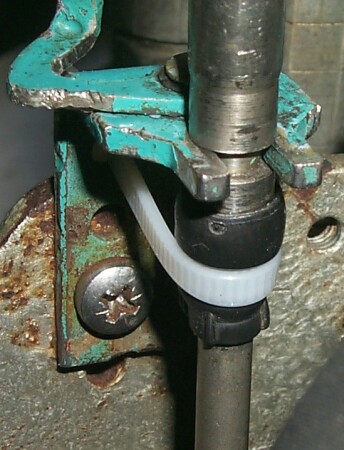 One
of two mounting points for the control cables. Because the bypass pressure
of our pumps was never set properly by Diport AG, the control cables had
a nasty tendency to jump from their mounts when the saildrives got snagged
on something.
Once the cable is free from its mount, it is impossible to control the pump. For example, you can't put the blocked pump into neutral and use the other one to motor to safety.
Since this cable is mounted far behind an imposing engine, you have to know where to look and how to put it back on. Then revert the pump to "neutral" and finally limp to safety. This is why we had Rexroth adjust the bypass valves on the pumps during the winter of 2000.
As you can see here, we had used zip-ties in the interim to prevent the cables from jumping again as the locking mechanism had become totally unreliable.
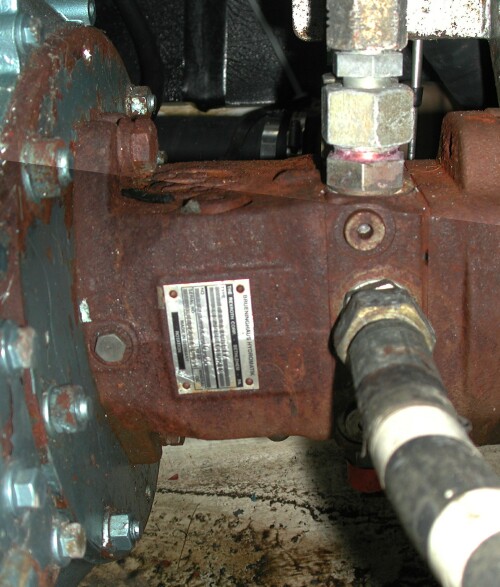
Here is a quick and dirty composite picture showing the back of the diesel engine (to left) as well as the first of two hydraulic pumps. The bolt-on flange for the second pump is just visible to the left. Below, the dirty rings of the bilge beckon. Since the hydraulic drives sit right under the cockpit drain, it is no wonder that they are covered in rust...
A very kind and patient David Bourgeois took me through the calculations how to properly set the bypass pressure on the pumps so that they will not over-torque the engine when they snag a lobster pot. The folks at Rexroth then described how to change the bypass pressures on the pumps in our Prout Escale. Basically, it could have been done... but it would have been very difficult to get to the adjusting bolts on the underside of the pumps. These bolts are under the orange hats that you can see under the pump to the right. Since the pumps looked unhappy from the constant water ingress from years before, we decided to send them in for a cleaning, inspection, and pressure-adjustment at Rexroth.
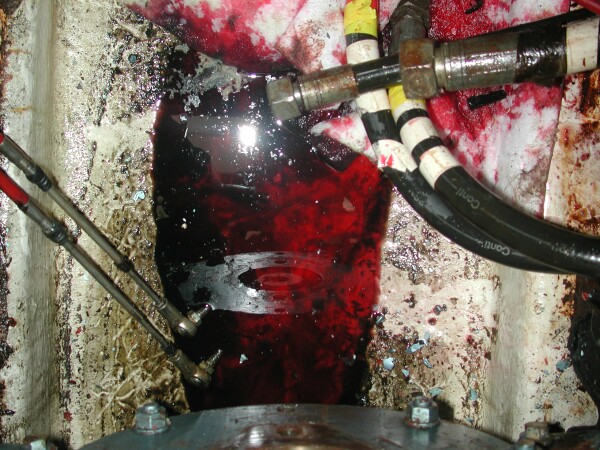
Evidently, the red dye we added for leak detection/tracing to our hydraulic oil did the trick. Here is a view of the bilge after we extracted the pumps. It almost looks like we slaughtered a small animal in there... Some hoses are visible, as are the control cables for the pumps. In the pool of oil you can see the reflection of the back of the motor and its mounting plate.
Spring 2001 Update:
Our hydraulic pumps had to return at one point (once we were out of about $2,500 to be exact), and after Rexroth had switched the distribution network. What beauties! Compare the pumps before and after service!
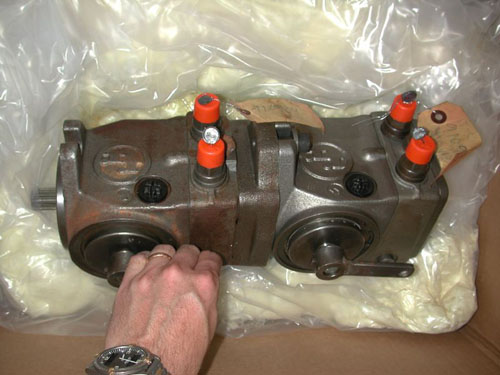
The pumps were shipped in a double-wall corrugated box with injected foam packaging on the inside. This sort of packaging is just about bomb-proof (a good thing when the package is this heavy) and great if they ever have to be returned again. This time we'll keep the packaging and the plugs!
Note how the pump to the left is much rustier despite the best efforts of Rexroth to clean it. This is the pump that was directly under the drain. Also, the control arm on the right pump is mounted incorrectly - easy enough to fix.
Year 2002 Update:
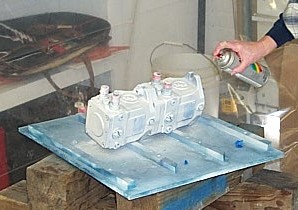
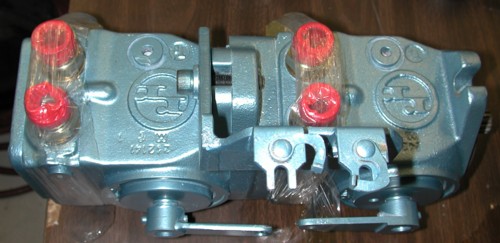
The pumps have been fitted with new hose interfaces and painted to match the engine. This should hopefully reduce rust to a bare minimum, should it ever return.
Given how dry the engine compartment stays these days, I doubt it will ever be a significant problem again. Below, the results can be seen.
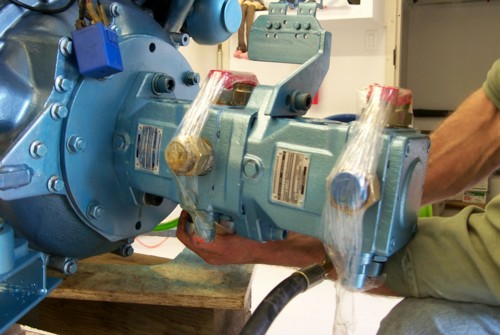
So now we had a functioning pump system. Once we had confirmed that the engine ran perfectly, we could re-attach the pumps back to the engine, before re-installing the combination into the boat. Note how the tape ensures that no plugs fall out and hence no contamination will reach the inside of the pumps. Given how fragile hydraulic systems are, you cannot be paranoid enough!
Update for 2003:
Last year, we discovered a leak in the hydraulic system. It wasn't until we filled the reservoir with some more red dye that the source became apparent:
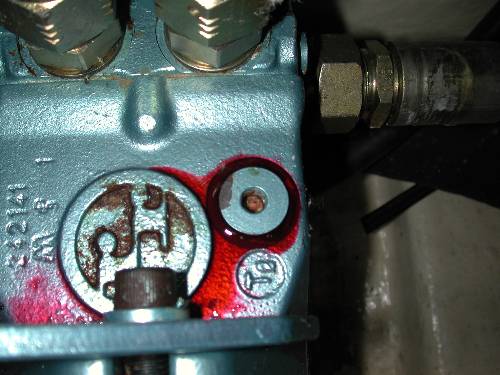
Evidently, one of the access ports had not been bolted down right. Luckily, it was on the top of the pump, not below where access would have been a big issue. An Allen-wrench later, this pump no longer leaks. Since we didn't touch this port, we wonder what else might be loose inside the pumps... Anyway, should you need some special bolts for applications like this, Rusty Schlatter at EPCO Products recommends their zero leak line of bolts with built-in O-rings. I haven't tried them, but the technology looks promising.
Best time estimate for this section:
| Remove hydraulic pumps | 2 hours |
|---|---|
| Track down Rexroth at show, get addresses of hydraulic gurus, confer | 3 hours |
| Send hydraulic pumps for service, pressure adjust to 2500 psi working pressure | 2 hours |
| Prepare, paint pumps | 3 hours |
| Reinstall hydraulic pumps | 3 hours |
| Total | 13 hours |
|---|


