


Mast Wiring and Conduit Choices
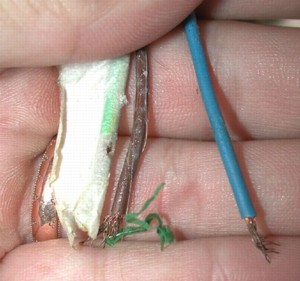
The wiring in the mast was as disasterous as we expected. We couldn't quite make up our mind what exactly Prout Catamarans had decided to use, but I think the insulation colors point towards regular household extension cord.
As the three wires inside such a cord did not suffice to drive the 4-wire Aquasignal Tricolor/Anchor/Strobe masthead light, the electricians at Prout catamarans simply added a second three-wire conductor to the mix. Thus, we ended up with six hull penetrations for our mast wiring!
Two dedicated wiring harnesses replaced the trio of conductors used by Prout Catamarans to power our Deck and Masthead lights. The replacements consist of two sets of sheathed conductors. The one running up to the mast is called "Mast wiring" by Ancor and consists of five 14 AWG wires. The Deck light got a similar triplex conductor.
The five-conductor bundle will allow the three lights of the Aquasignal masthead light to use two wires to act as returns. While this is not exactly equivalent to using 11AWG wiring, it is the closest thing commercially available to meet the Coast Guard/ABYC requirements and far superior to the Prout Catamarans "solution". The cable replacement occured at the same time as the stay pins replacement in the masthead.
Naturally, we discovered additional details as we took the mast connections apart. Most notable was the radar antenna cable which had been installed without a splice at the point at which it entered the boat.
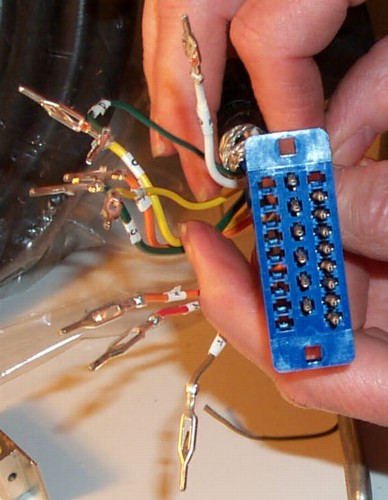
Faced with such a situation, most boat yards advocate cutting and splicing the cable. Naturally, this is a great way to keep their electricians busy. We discovered that the connector that plugs into the back of the radar unit can be disassembled completely. Once the big thermoplastic connector body is out of the way (blue in our case, see right), the pins and the signal wires can be protected with electrical tape and the radar cable extracted from the boat.
The trick is simply to find the right-sized paper-clip. For our harness, the clip had to be inserted from the front in the little bay next to the actual pin. Use the paperclip to disengage the little metal tab on each pin - then pull the pin out of the plug housing.
On the front of the plug housing, small numbers molded into the plug housing indicate what hole you removed a pin from. We labeled each wire as we removed pins and thus were able to re-assemble the entire plug when we finished re-assembling the mast.
While this may look complex, it is not. All you need is a paper clip, patience, lots of light and perhaps a magnifying glass - MUCH simpler than properly splicing 26 wires!
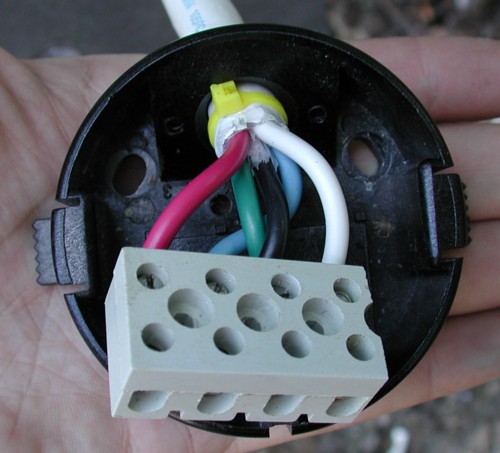
In the picture below, you can see how we interfaced the mast-head wire assembly with the base of the Aqua-Signal light. The black and the green conductor act as a ground return, while the three other wires control the various functions of the light. A simple zip-tie prevents the sheath from being pulled out of the fitting. Some silicone-based dielectric compound should protect the exposed wires inside the terminals for the time being.
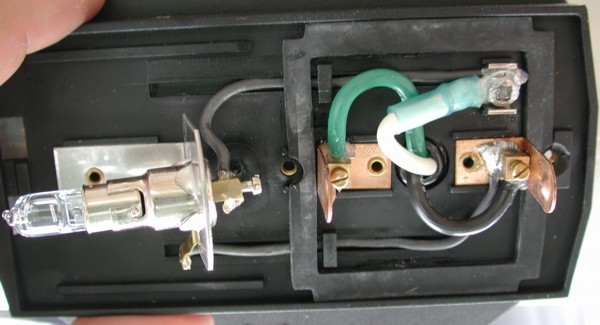
We also replaced the badly corroded deck and steaming light combination. Here, three 14 AWG wires suffice, even if the green wire acts as a positive conductor for the steaming light. Given that we couldn't add another conduit, we elected to wrap the deck light wiring harness with pipe insulation and then zip-tied it to the better supported radar wiring harness inside the mast. Meanwhile, the mast-head wiring harness has to share conduit space with the antenna cable and the wind-mater.
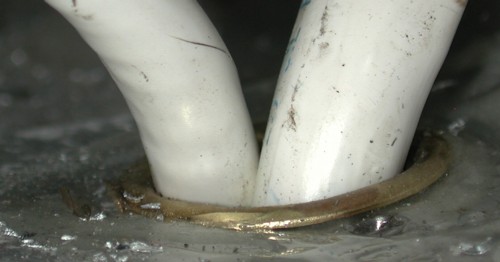
Here is a shot of the base of the mast, looking in. The conductor snaking up from the left bottom corner is for the Radar. The conductor running left into pipe insulation is for the deck. The conductor bent to the right goes up to the mast head via a conduit, along with two other wire assemblies (VHF and wind-sensor).
Given that we wanted to reduce the clutter on deck, the next question was, how to best get the wires from inside mast to the deck. I didn't want to weaken the mast any further by increasing existing hole sizes unless I had to. Browsing the local chandlery, inspiration struck us when we looked at some sink drains.
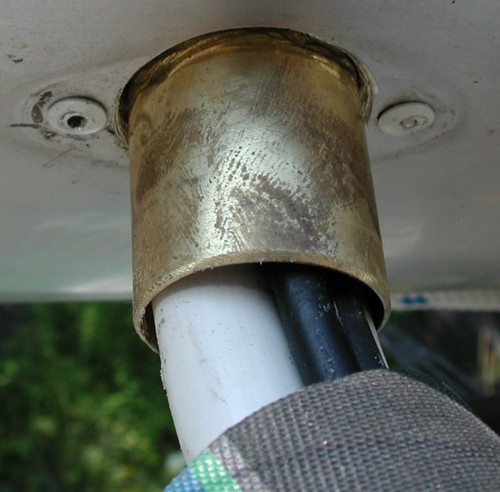
They are made of thin copper tubing which has a diameter of 1" and a gentle lip on one side. They were almost exactly the size of the hole in the side of our mast. Thus, we were able to create a conduit for most of the wiring in our mast. A thin-walled exhaust hose then carries it to the deck. Now, instead of six deck connections, we only have two, a much more manageable number than what Prout Catamarans burdened our Escale with.
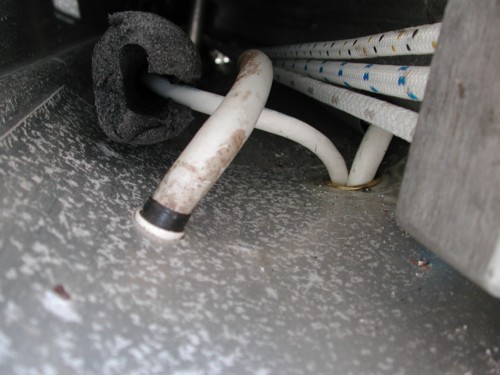
Below is a image showing the conduit, the wires, and the protective hose cover. The pop-rivets in the picture are just to fill the holes of the previous chafe-guard. The actual "drain" is held in place with epoxy.
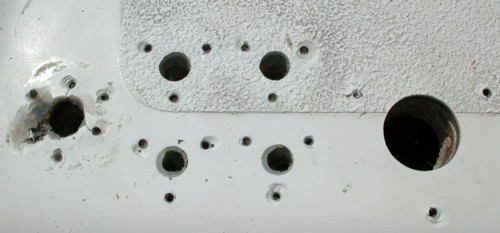
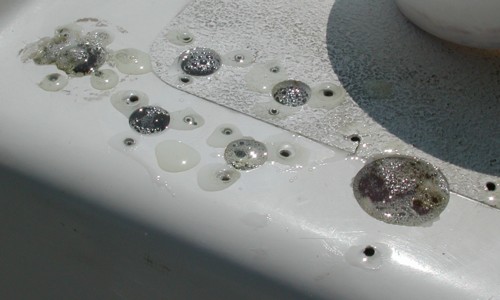
So now that we'd figured out how to create a better way to bring the wires from the mast into the boat, the time had come to fix the deck and the many hole penetrations that Prout Catamarans had drilled into it. In the picture below, the VHF thru-hull is to the very left. In the middle, four thru-hulls carried navigation light bundles and the wind-sensor wire. The large hole to the right held the radar conductors. This set of holes used more than 12 inches of deck space and exposed all the wiring to the degrading effects of the sun.
We carved out a lot of balsa adjacent to the holes, then proceeded to seal them from below and then fill them with Epoxy. This is the only way to ensure that the replacement holes will be water-tight and the deck strong. We then faired the deck and re-sprayed it with Gel-coat. Only then did we install the seond drain and a new thru-hull for the radar conductor.
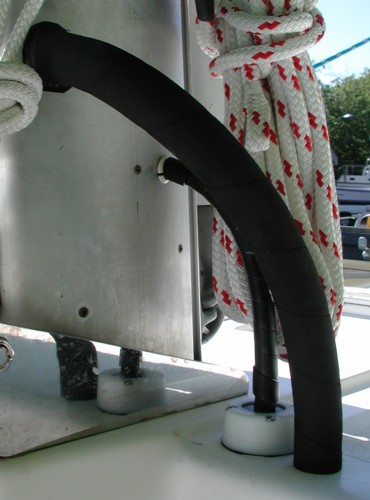 The end result is a elegant way to get all the wires in your mast safely into the boat. We glued the tip of the exhaust hose to the mast with some Sikaflex in order to ensure that the connection would stay water-tight.
Note the beautiful deck fairing job that Gerald did - you'd never guess that six crude holes and their asorted fasteners once were where only two conenctions are now.
The radar wire is now covered with a sheath, which will hopefully afford some UV protection.
While the choice of conduit could be more elegant than the thin-wall exhaust hose we found while rummaging through the local chandlery, the hose is more than adequate for the job. This means better visibility from the skippers chair and more robust wire protection in case the genoa lines flail around the cockpit again.
Some companies like to show off their deck-connections. But as the number of wires running up masts increases, so does the appeal of a simple conduit system.
The only potential downside to this system is the possibility of water draining down the wires inside the mast, into the conduit, and from there into the boat. Not very likely in my book, and it is easy enough to add sealant inside the mast if necessary.
Best Estimate of Time Required:
| Remove, label radar pins, snake radar wire out of boat | 3 hours |
|---|---|
| Replace wiring in mast, install new deck light, etc. | 4 hours |
| Install mast conduit, seal | 3 hours |
| Re-work, fair deck, install new thru-hulls | 12 hours |
| Make connections in electrical closet | 1 hour |
| Total | 23 hours |
|---|