


Avoid Cheap Deckware
 In our opinion it's best to avoid the Barlow gear that Prout catamarans specifies as "standard" deckware for its boats. On our former 37' Prout Snowgoose we had enough experience with Barlow that we specifically forbid its use on the Cats Pyjamas.
For example, we opted for Barient self-tailing winches, ProFurl furling systems, etc. which were $$$ "options". Not to criticize Barlow too roundly, it is conceivable that Prout catamarans specified equipment whose actual working load was too close to the failure load.
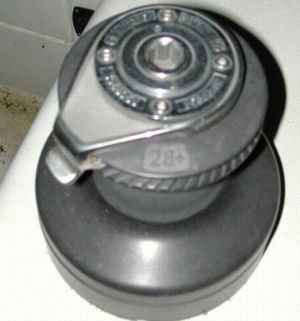
Nonetheless, the mainsail traveler as delivered by Prout Catamarans was made by Barlow. The traveler seized under moderate loads and could not be moved, period. This design was so under-designed that binding under load was inevitable due to flexing. Eventually, we tried to move the traveler with one of the main winches, causing the traveler block to explode.
Perhaps Prout wanted to add some excitement to our day? Unlike other Prout owners we came away from this incident without injury. For example, take the family in Florida who discovered the explosive effects of Prout catamarans' installing a copper propane gas line in the bilge. The copper line failed eventually due to the corrosive effects of water in the bilge (which is why intelligent boat builders would never, EVER install any sort of gas line there, particularly not copper). With several people on board, breakfast was being cooked. Then the LP in the bilge lit off and burned several occupants (mainly children) up to 60% of their body.
Luckily, this was the only dangerous deckware besides the masthead pins that had managed to sneak on board. Our traveler replacement, a Harken unit, has been great. Even under high loads, the boom can be moved easily and I have complete confidence in it. But what if the Prout Catamarans' traveler (or its pieces) had hurt someone? How do these people sleep at night?
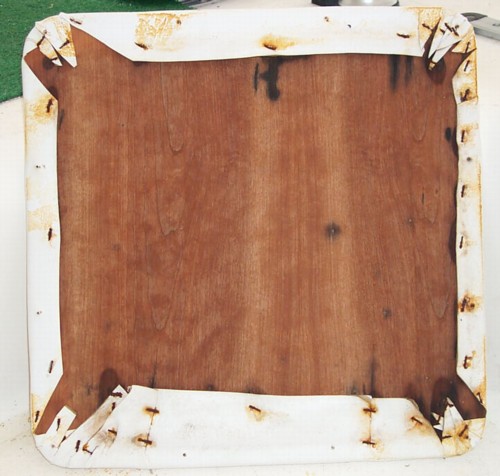
Another worry were the cleats installed on board. Much like the windlass, I didn't expect Prout to install backing plates for them either. Thus, we set out to install backing plates throughout the boat. The picture below shows our first foray into removing the existing cleats and their hardware. Prout had glassed over the nuts inside the hull after the cleats were installed, so we had to remove some fiberglass to get to them!
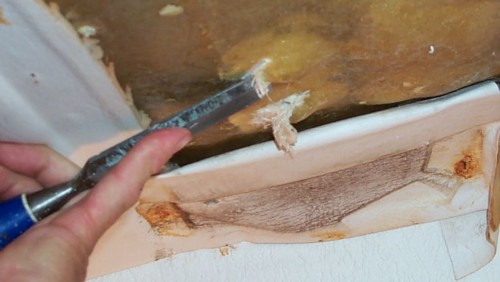
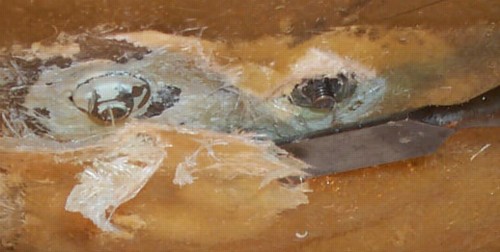
As usual, the installed fasteners had been painted white after their installation by Prout. Once the fiberglass was out of the way, it was no longer impossible to remove the deck hardware. Note the use of washers, something we did not expect!
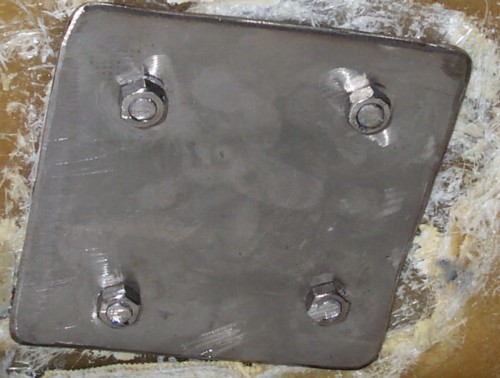
Our new backing plates allow the cleats to distribute their loads across a much larger area. This should increase the strength of the connection to the same level as that of the bolts holding the cleats in the hull.
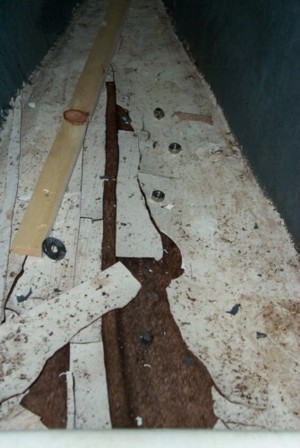
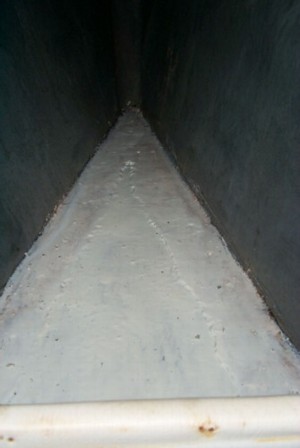
As with other projects on board, one project leads to another. For instance, when we elected to rebed the port forward deck cleat, we discovered that the front crash compartment had been waterlogged due to a slow deck leak. The first hint was the cover, which, once removed, illustrated with its rusted staples that we had a water problem.
The space behind the cover was wet and very unhappy. As usual, the cheap paint that Prout used to "waterproof" the plywood floor structure had delaminated. We had to dry this space for several days before we could paint the surfaces with real epoxy paint. Besides replacing the staples on the cover with the Monel variety, we also installed a vent, which will hopefully allow any condensation build-up in here to vent into the rest of the boat.
Best Estimate of Time Required:
| Remove wrecked traveler | 2 hours |
|---|---|
| Install new Harken traveler | 4 hours |
| Remove headliner covers over cleats, refinish withmonel staples | 12 hours |
|---|---|
| Remove fiberglass cover under 6 cleats | 6 hours |
| Create backing plates, install | 6 hours |
| Cover and seal | 3 hours |
| Restore front port crash compartment | 12 hours |
|---|---|
| Re-staple, vent compartment cover | 4 hours |
| Total | 49 hours |
|---|