


Windlass Repairs and Discoveries
One of the most expensive pieces of equipment installed in the forward area will be the windlass. This machinery usually consists of a permanent magnet motor with a gear system that allows you to control the length of the anchor rode with ease. Our windlass is a Simpson-Lawrence Seawolf 900 design that was delivered with a relay system and a foot switch next to the windlass.
The Simpson-Lawrence foot switch lasted a few years before the shoddy silicone sealing job made it rust out. The relay mounted next to it in the anchor well had been replaced at least once before and cost a fortune. Unfortunately, no switch was going to last any amount of time under the conditions they were originally installed, as the complete lack of protection from salt spray as the anchor chain would be retrieved ensured ample exposure... we will retrofit a box.
Furthermore, as installed, the foot switch was always "hot" whenever the electrical systems on board were activated. Since the switch was not covered, it was hit more than once by guests on board when it was not supposed to. Evidently the overload switch protected the motor, despite many overload conditions.
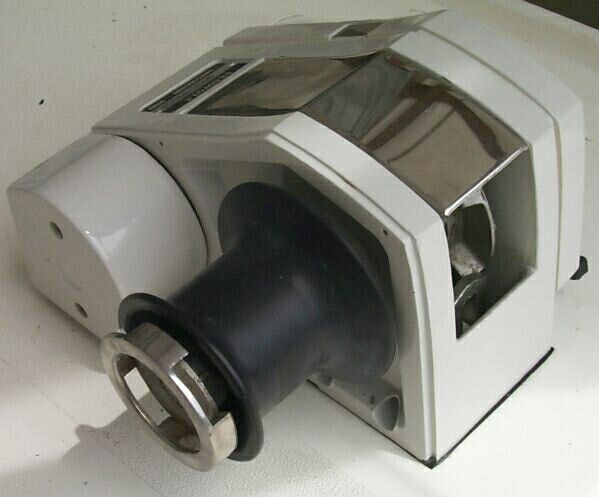
Some erratic operation and oxidization of the outer skin led us to disassemble our Simpson-Lawrence windlass in the spring of 2000. The original intent was to strip and sandblast the exterior pieces, then repaint and re-assemble.
Once inside the windlass, we discovered that the windlass had suffered from water ingress and parts inside had started to rust. In the picture below, you can see two extracted INA roller bearings... in this condition they're pretty much useless.

Happily, we found replacements at motion-industries.com for 3.5x less than directly from Simpson-Lawrence. It really is too bad when a manufacturer decides to make standard replacement parts a "profit center". Now that Simpson-Lawrence has gone under, we are truly lucky that INA still makes all these parts.
Thanks to Bob Samworth, I have a number of actual bearing part numbers that he got from his Seawolf 520. While the part numbers might not be identical to the bearings used in your Seawolf, at the very least, they tell you under what series to look at the excellent INA web-site. Here is an excerpt from his letter:
"Only the bearing on the motor is a roller clutch (INA part number HF 2016). The six bearings on the gears are needle bearings (INA # HK 1512). Seawolf uses inner rings on these. The two main shaft bearings have built in oil seals on both ends (INA # HK 3516-2RS)".
Thankfully, S&L manual is detailed and clear. We subsequently also cut our own gasket from superior material - easy enough if you didn't destroy the OEM gasket and have the skill and inclination to cut your own. The steel gears inside the windlass had also started to rust but we luckily fixed the problem before it became permanent.
We also discovered that the permanent magnet motor had 10 windings of cooked lead wire wrapped around it. We scratched our heads over this one for a while: Who wraps lead wire around a motor inside a housing when it's installed?
The answer is surprisingly simple: Simpson-Lawrence does when they build the windlass, so that the installer has a reasonable "pigtail" of wire to work with. However, S&L also specifically calls for the lead wire wrapped around the motor to be removed when the windlass is installed. Otherwise, you just ensure unnecessary voltage drop, heat build-up, and risk a potential short-circuit.
Yet another instance on board where the Prout employees either didn't read or didn't care about the installation manual. (sigh)
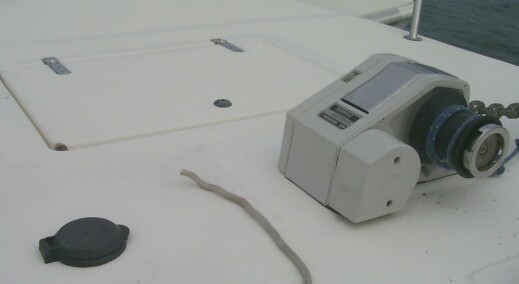
After refinishing the housing parts, replacing all bearings, lubricating all gears with lots of marine rated grease, and replacing the lead wire, we put the windlass back together again. It looks brand-new and should give us years of trouble-free service.
The rehabilitated windlass with its "new" covered switch
Best Estimate for Time Required:
| Remove windlass | 20 minutes |
|---|---|
| Split case, disassemble, determine what is needed | 1 hour |
| Find source with right bearings, seals, etc. drive, pick up | 2 hours |
| Clean internals, make new seal using old one as template | 1 hour |
| Strip, re-paint exterior with rubberized epoxy paint | 1 hour |
| Reassemble, re-lubricate | 1 hour |
| Total | 6.66 hours |
|---|