
Keeping your Steam Boiler Happy
Here are some pictures from the basement of a house that we used to rent an apartment in. The house was built in the 1920's and features two steam boilers that are attached to single-pipe steam systems. Like all heating appliances, these boilers benefit from regular maintenance. With the help of a conscientious service technician, your boiler will be safe and efficient for another year.
Our boilers were serviced annually. Besides annual maintenance, the homeowner/renter also ought to blow down their steam boiler monthly to ensure that the boiler water is clear of rust and that any low-water-cutoff (LWCO) devices are functioning. Have your technician show you how to do that safely, it only takes two minutes from start to finish. Hot-water systems do not require blow-downs, in fact you should avoid changing boiler/system water in hot water systems as much as possible as it can lead to rusting and premature failure via dissolved oxygen in the replacement water.
If your heating system springs a leak, a LWCO will shut the boiler down before it runs out of water. This is very important, as most boilers that are dry-fired for any length of time will fail permanently. Thus, a small leak can quickly turn into a big bill.
One night, our neighbors steam boiler sprung a leak. As a result, all the water ran out of the boiler. Such a failure in itself is not a problem as long the boiler does not fire. Normally, the LWCO in the boiler prevents just that: Once the water level in the heat exchanger drops below safe levels, the float switch in the LWCO closes and the boilers shuts itself down.
Unfortunately, the float switches can clog easily with scale, rust, and other debris from inside the boiler. This is why it is so important to "blow down" your boiler and verify that the switch is working. While such maintenance is typically the responsibility of the landlord, it's easy enough to do even as a tenant.
So, despite the lack of water in the heat exchanger, our neighbors boiler fired all night. The results were somewhat predictable - a very unhappy boiler. By morning, the boiler had fried itself and the basement was filled with acrid smoke. I shut off the gas valve, then the electrical supply. Bits of plastic on and around the heater had melted. The customary precaution of not storing anything combustible around the heater paid off - there was no fire outside the boiler. However, the floor and all objects around the boiler were hot or too hot to touch.
Lesson Learned: Preventative Maintenance is important. Don't just drain your steam boiler until the water is clear - verify that the float switch has not become clogged with debris. It's easy enough to test, following the manufacturers instructions. As a safety precaution, be sure to know where the fuel valve and emergency switch for the boiler are before you test and protect yourself from the potentially scalding water. Should anything go wrong, shut off the fuel and the electrical supply and call a professional.
Lastly, don't leave any combustibles around heating appliances, even if they don't get warm under normal use. Abnormal conditions can make them hot enough to peel the paint, melt plastic, and ignite paper. Most importantly, DON'T EVER TRY TO REFILL A BOILER THAT HAS DRY-FIRED UNTIL IT HAS COOLED DOWN COMPLETELY. YOU COULD CAUSE A STEAM EXPLOSION, RESULTING IN PROPERTY DAMAGE, INJURY, AND/OR DEATH!
Click on any image to enlarge it.
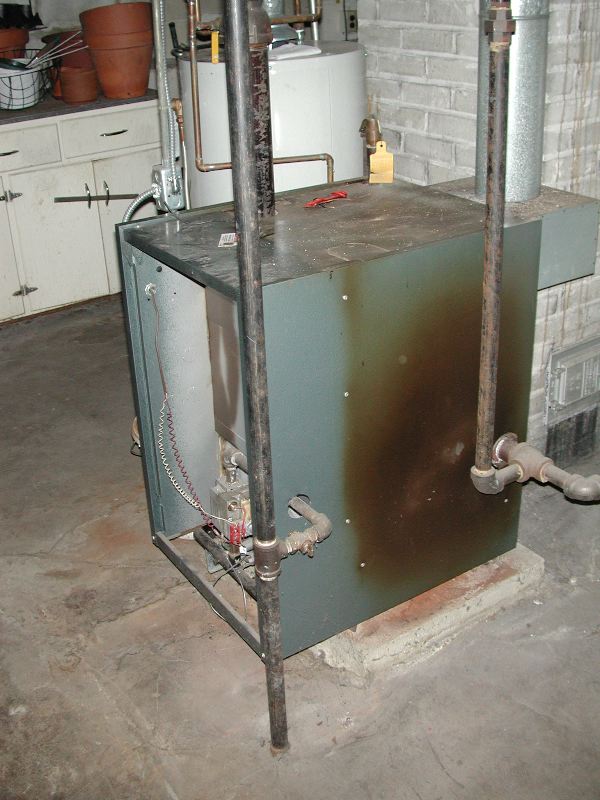 A side view of the neighbors steam boiler. Note the discoloration of the paint. |
 ...the front doesn't look great either... |
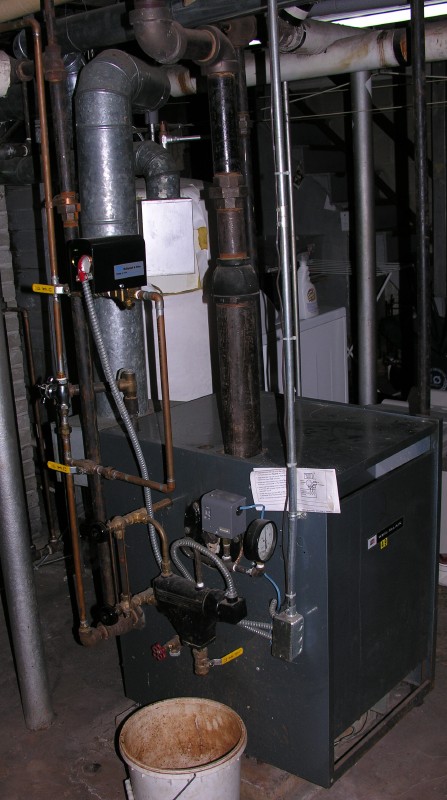
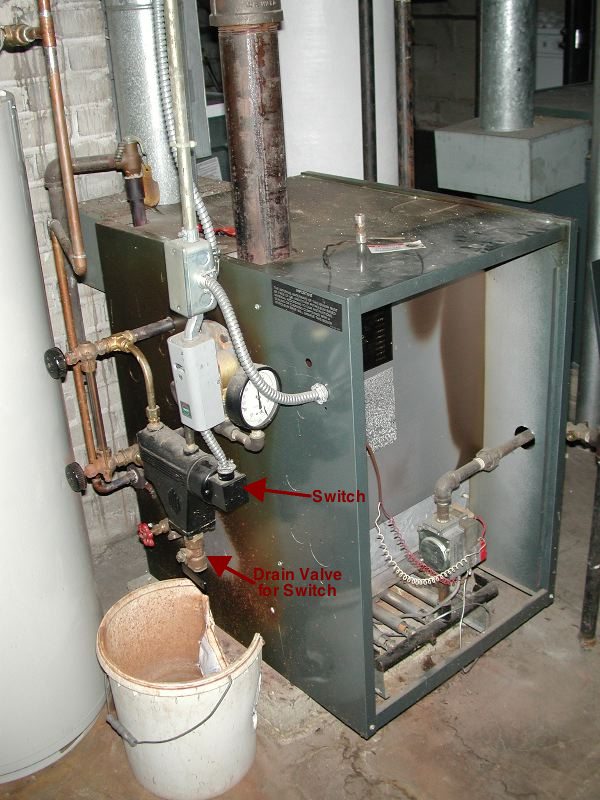 The other side is also discolored. In the enlarged picture, I have indicated the LWCO and the drain valve to test it with. |
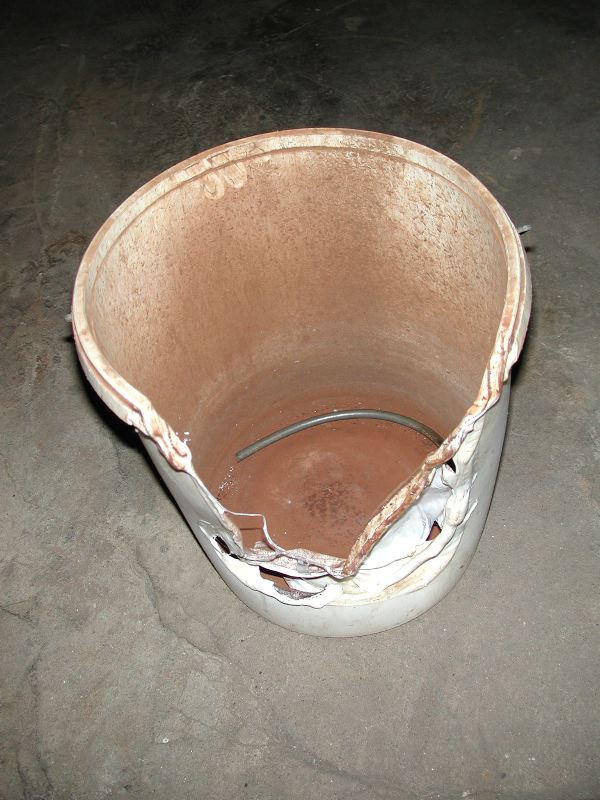 The water pail next to the furnace melted significantly. It is an indication of how hot the sides of the boiler became as it dry-fired. |
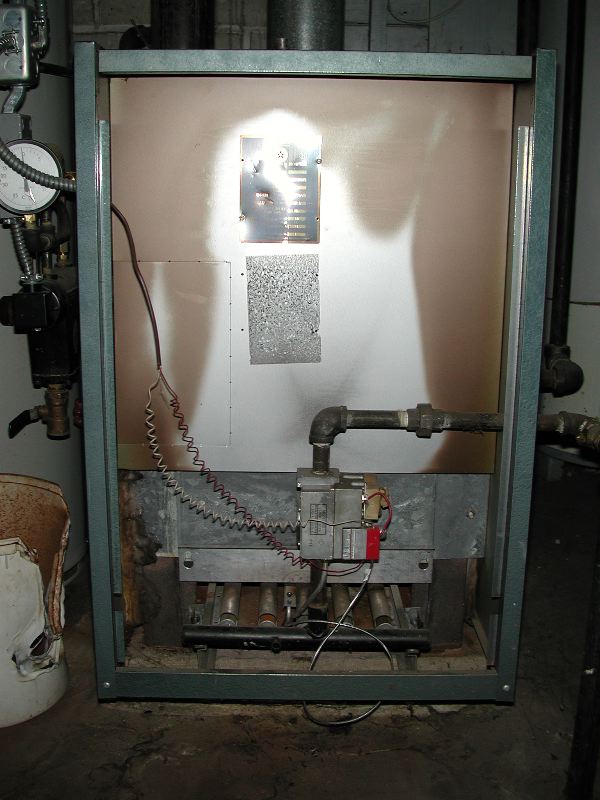
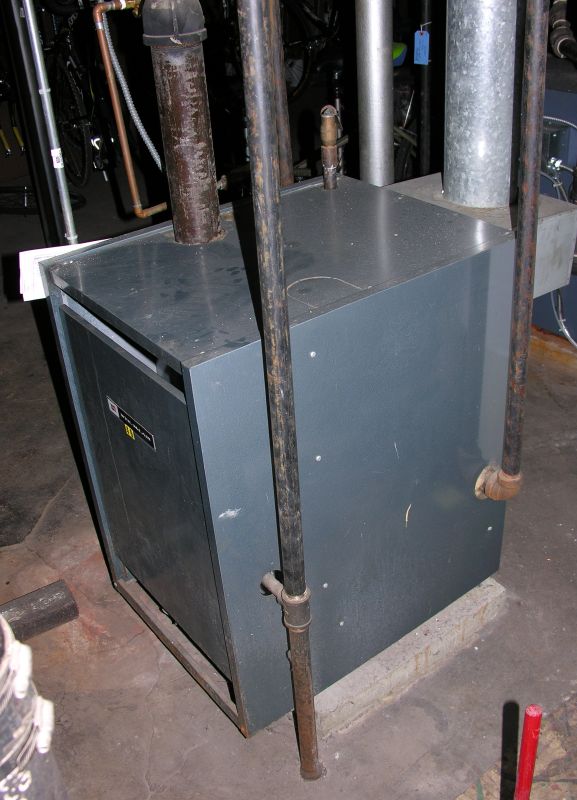
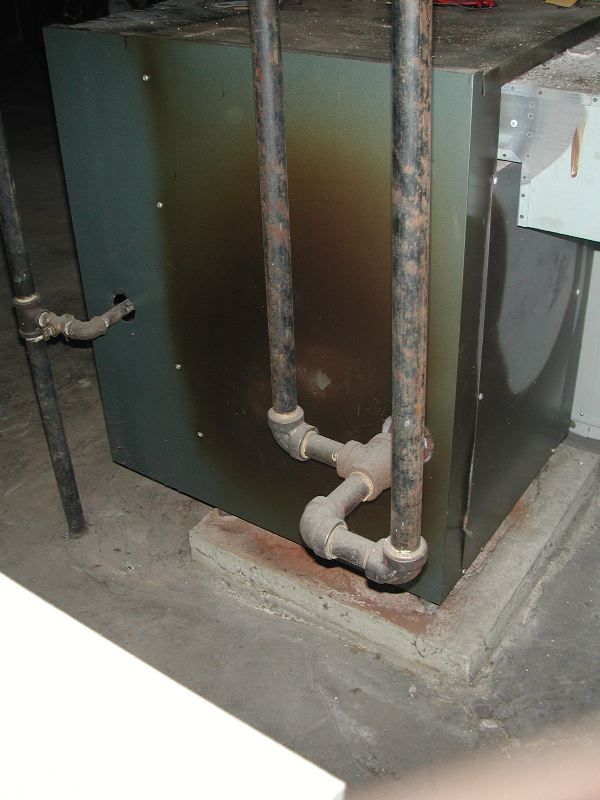 The rear of the boiler does not look much better... note the absence of a Hartford loop. |
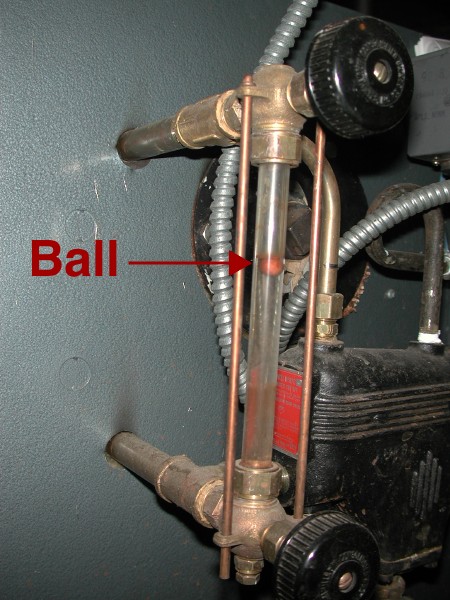 A plastic ball is an old yet useful tool installers used to install in sight glasses to make it easier for homeowners to see where the water level is. Allegedly, they are hard to find now... |
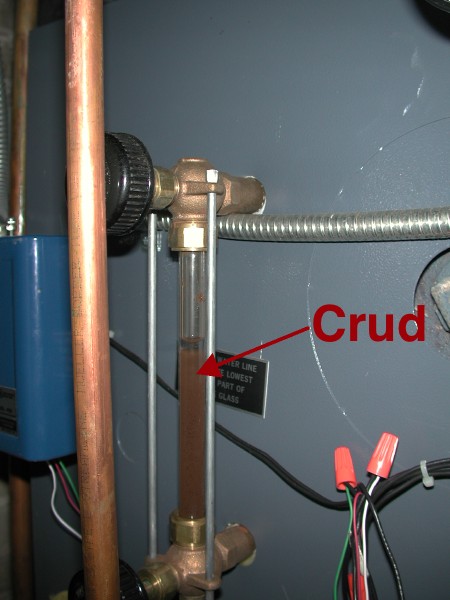 Note the discolored boiler water in the sight glass. This boiler needs to be drained a few times to get all the crud out and to ensure that the LWCO switch that prevents dry-firing does not get plugged again. |
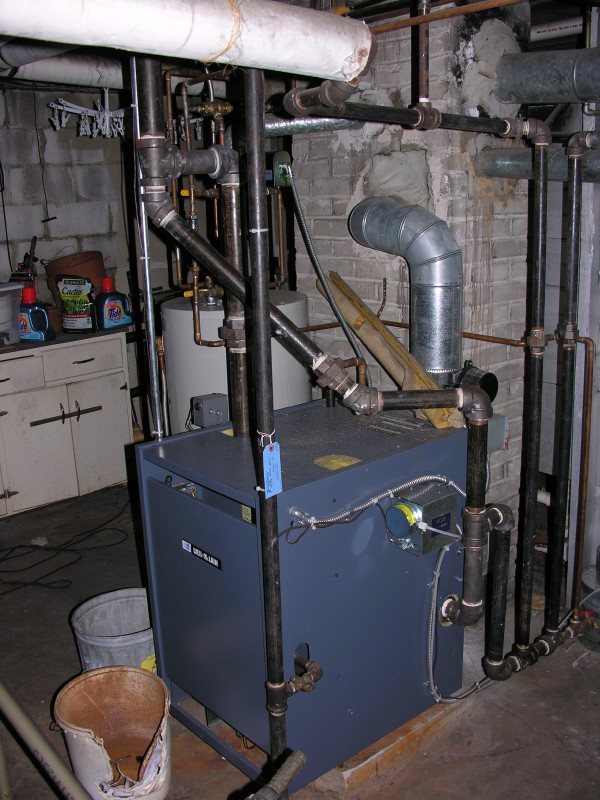 Here we have the replacement boiler that a local company installed. Notably, the new install features a Hartford loop as well as a dedicated fan-assisted air supply. However, I do not like the look of the header, which features a bull-headed T and small pipe diameters. For all I know, it works well even if the manuals and literature I've read would predict otherwise. |
Thankfully, passive safety carried the day... nothing ignited. So remember to check the safety devices on your boiler at least yearly. The same goes for circuit breakers. |
 Not that undersizing headers is that uncommon, as our boiler attests. Observe how the header piping is reduced as it approaches the midpoint to the ceiling. Most likely, the installers did not have the large-diameter pipe on hand to do the job right, so they went for whatever they had on their truck. A larger pipe diameter would make for drier, more economical, steam. |
 Here is our old boiler from the other side... no Hartford loop, minimal mains venting, etc. Despite all this abuse, it has held together, though at a high operational cost. |
For a great education in all things steam, I heartily recommend visiting heatinghelp.com, where Dan Holohan and his trusty Wallies not only maintain a great online forum but also a wealth of information. Plus, Mr. Holohan sells a bevy of books on steam, including the classics "We got Steam Heat" (a primer for Homeowners) as well as the far more comprehensive "The Lost Art of Steam Heating".