

How to Retrofit Ventilation Holes to your Airport Base Station
A while back, John Yeh put together good instructions on how to retrofit ventilation to your ABS (since updated by Greg Branche). While I thought the results were beautiful, I looked for something simpler that I could do in less time. Furthermore, since I was not adding active ventilation, I was looking for a solution with fewer but larger holes that would work better with simple convection.
Not that much in terms of convection can happen - the carrier blocks almost all air flow within the ABS, even with lots of holes in the exterior shell. On the other hand, any convection is better than none and your unit will run a lot cooler as a result.
Note that any work on your ABS will void your warranty. Furthermore, there is a possibility of you hurting yourself as a result of undertaking this project.
As usual, your milage may vary and everything is at your risk alone. YOU MUST TAKE THE ABS COMPLETELY APART AND REMOVE THE ELECTRONICS INSIDE PRIOR TO DRILLING. Only drill individual pieces with proper support and a expendable base (such as a scrap piece of wood) that you do not mind drilling odd holes into.
Here is a list of items that you'll need:
- Dry-erase maker (easy to erase) or Sharpie/Edding (harder to erase)
- Electric Drill
- 3/4" step bit, 1/16", and 3/16" drill bits
- Piece of scrap lumber (to drill on)
- Drilling Template (a PDF for people who like to do things precisely - Thanks John Siberian!)
Start with the Bottom half of the outer shell. Remove it from the rest of the ABS and place it on the scrap lumber. Since you will never see these holes, being super-accurate in their placement is not of paramount importance.
But if you are a stickler for detail, print out the use a ruler to precisely locate the midpoints between the rubber feet and the center of the shell. I just did it by eyeball and drilled the holes with the step drill until they were about 1/2" wide. These holes serve primarily to vent heat from the modem card.
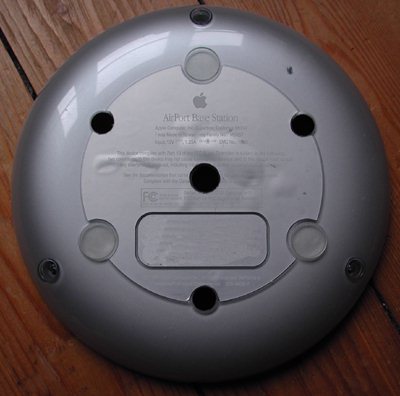
Bottom Shell with 4 Hole Pattern
You can do the same with the top half of the ABS. If you are handy with the step drill, you do not even have to remove the other plastic pieces that block access to the piece that we'll be drilling into. Once again, I used the eyeball approach to place a center hole, followed by the two at the fringe. These are probably the most important holes since they are right over the voltage regulator where a lot of heat is being generated.
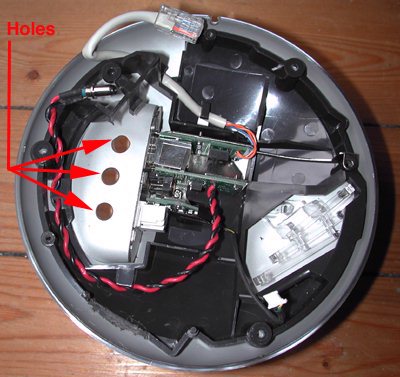
Top Half of Shell after drilling
You want to drill from this direction since the other way id blocked by the overhanging plastics. If you are a stickler for detail I would like to suggest you remove everything by unscrewing all the plastic pieces.
Once you are left with the "kidney" by itself (see the other ventilation article on how to do that), you can drill holes very accurately. I contented myself with having to angle the drill at times to achieve the hole diameter I wanted. The end-result isn't fantastic but only took 5 minutes to achieve.
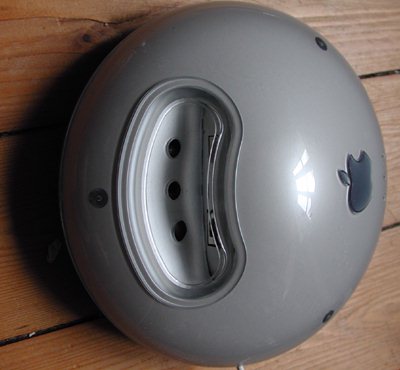
View of Top with Ventilation Holes
Now it's time to make the carrier card somewhat more porous. Remove the Wavelan card by pulling it out of its socket. Then undo the clips on the periphery of the carrier pieces and take the motherboard out. Place the motherboard safely away in an area where it will not be exposed to your current job. Furthermore, before you touch the motherboard be sure to ground yourself briefly by touching a grounded object such as a bathroom fixture or equivalent.
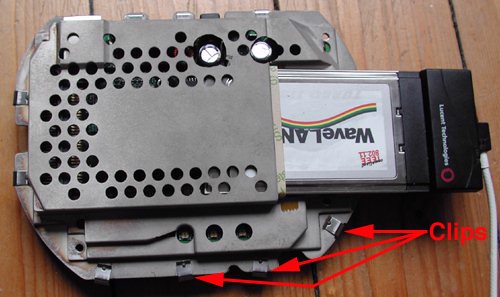
Removing the WaveLAN card
Place one carrier piece over the other and use the indelible marker to create a hole pattern. After starting at the bottom, work your way up by overlapping hole patterns.

Overlapping carrier pieces to transfer hole pattern
You should end up with a hole pattern largely similar to the one in the picture below. Start pilot holes with the 1/16" drill bit, then enlarge them later with the 3/16" drill bit. Don't apply a lot of pressure since the carrier plastics are fragile and all the holes will weaken them. I skipped every other row since my placement wasn't great and I wanted to ensure that the carrier wouldn't break.
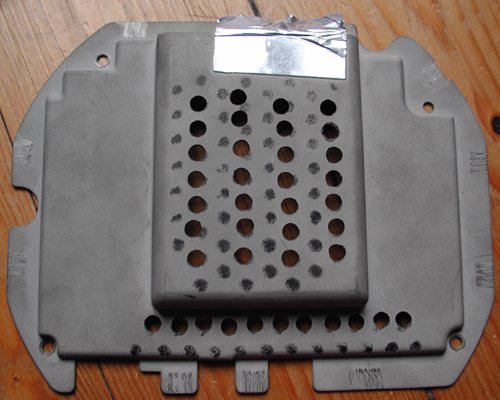
Here is the marked and drilled Carrier
Be sure that all subsequent holes have smooth edges and no burrs. The carrier plastics are electrically conductive and the shavings could short out your ABS motherboard. Now reassemble everything in reverse order and you should be done. While the plastics may have reached uncomfortable temperatures in the past (note the bubbling sticker on the underside of the first picture on this page) the unit should now run much cooler.